How To View Tracks History
Track view is one of the basic tools commonly used to see the location history. We provide a powerful and easy way to view tracks for the chosen date and time range.
You can retrieve the tracklist and view those tracks on the map – for any date range up to 3 years.
Select the required assets from objects list. You can take one or mark multiple assets at a time. Click on the tracks button under the list
Once you click the tracks button, the following window will popup with settings for you to choose from:
Split with parking– The whole track (i.e. the track of the day) can be split in trips for better view. The parking state is defined with Stay maximum speed and Stay minimum duration parameters, as configured by user in the devices window.
Show events – Enable showing related events which have been logged. The rules for events can be configured in the rules window.
Show LBS – Select whether you want locations defined by GSM and WiFi signals (less precise than satellite navigation) to be shown.
Clustered – If this box is checked, the Interval and LBS locations with same coordinates and accuracy will be stuck together and shown as one clustered landmark.
Smart filter – It filters out the most common inaccuracies caused by weak GPS signals, errors in LBS locations and others. The track looks better and more understandable to user. Normally it is recommended this checkbox to be enabled.
Colour mode – Choose how you want your tracks to be coloured. This option allows you to draw multiple tracks and compare them without getting confused.
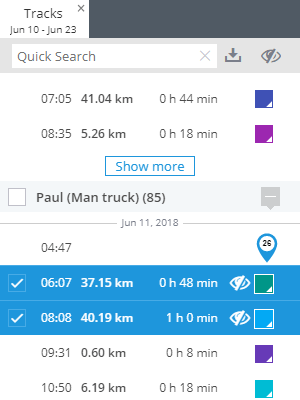
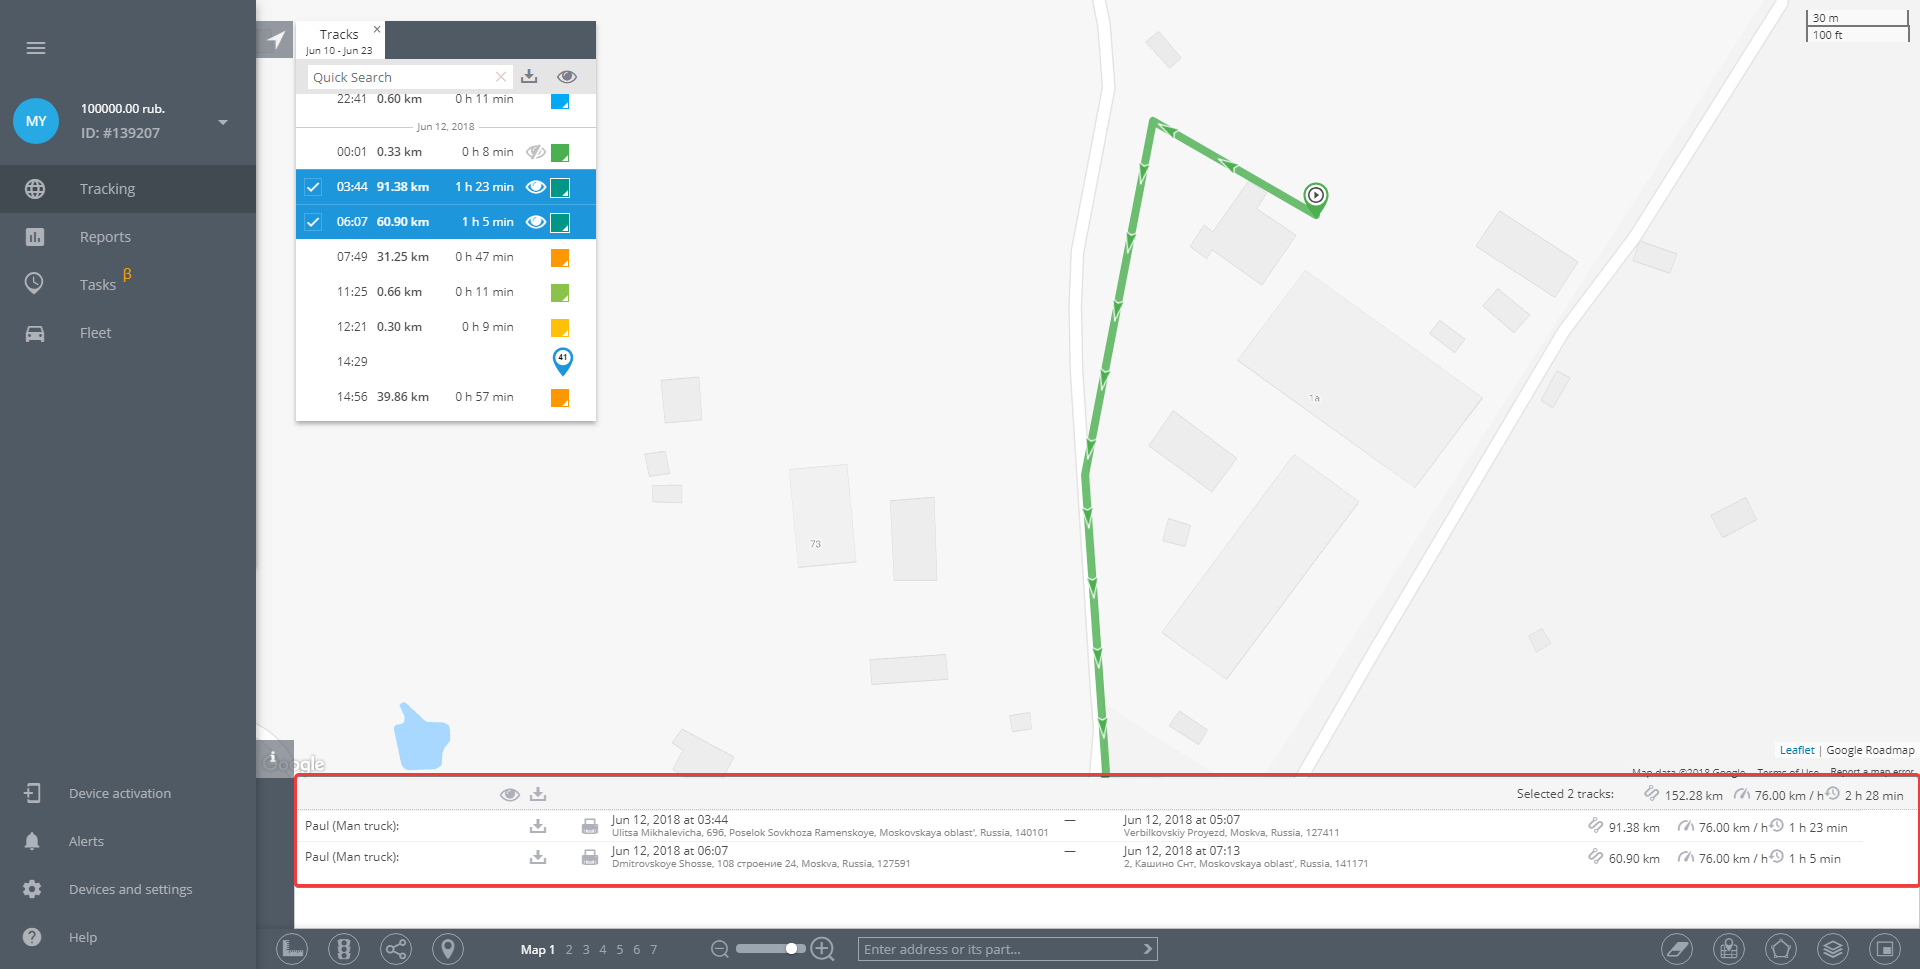
Click Show tracks button. You will see the tracks list with brief details. By clicking on the View icon you can draw any selected track(s), change its colour, etc. Each result is shown in a separate tab, so you can view tracks for different assets and dates at once.
Detailed track information will be shown in the bottom of the screen under “i” icon. If you selected multiple tracks, there will be also summary information.
If you have any questions, please contact support on 1300 735 797 or email support@connectfleet.com.au
Related Articles
Object List
Object List User assets are listed in the Object list. It’s a small window on the map which can be resized and moved within the screen. You can also collapse and expand the Object list when needed. To do this, simply click on the arrow sign in its ...How to view your users activity logs in Connecttrak?
This will give you the ability to view and monitor your user access to the Connecttrak platform to give you peace of mind about what your users are doing on the Connecttrak platform. Select the drop-down arrow and select "Activity Log" in the top ...Route To The Point
Route To The Point The platform can easily create a route between two addresses or points on the map. To create a route you are to point (left mouse click) its start and its end on the map. The system will create a route automatically. In case you ...X-GPS Monitor for Android
Our mobile app, X-GPS Monitor for Android helps you stay aware of real-time objects' location and telemetry using your Phone or Tablet. Basic Features Location of the objects online The track history for any period Your location on a map ...X-GPS Monitor for iOS
Our mobile app, X-GPS Monitor for iOS helps you stay aware of real-time objects' location and telemetry using your iPhone or iPad. Basic Features Location of the objects online The track history for any period Your location on a map Notifications ...